In Sydney, there exists the most magical place in the world: the Bourke Street Bakery. Located in my old neighborhood of Surry Hills, it is a tiny cupboard of a bakery whose baked goods—glorious, crusty breads ranging from soy-and-linseed sourdough to fig and walnut; flourless chocolate cakes; savory sausage rolls and pies; and oh-my-word tarts—create a queue that stretches out the door and down the block every morning.

The day before I moved back to the States, I broke down and bought their (expensive, heavy, beautiful) cookbook. I have not regretted it.


Take this chocolate ganache tart, for instance. The rustic-looking shortcrust is buttery and crumbly. And the filling is just pure chocolate joy: smooth, rich, perfect. I’m usually a dark chocolate partisan, but am fully behind this milk-chocolate version, since it’s not cloyingly sweet.


This is a project, no bones about it. But the shortcrust recipe makes enough for two big batches of tarts, allowing you to store half in the freezer for later use. And the final result of crumbly crust + smooth, rich ganache is out of this world. This will impress as a holiday dessert or seriously elevate a Sunday night dinner.

Bourke Street Bakery’s chocolate ganache tartlets
Makes 20 3 1/4″ tartlets
From Paul Allam and David McGuiness’ Bourke Street Bakery: The Ultimate Cooking Companion
Ingredients
Sweet shortcrust pastry (makes one quantity)
400g (14oz) unsalted butter, chill, cut into 1.5cm (5/8″) cubes
20 milliliters (1 tablespoon) vinegar
100g (1/2 cup) caster (aka superfine) sugar, chilled (regular is okay if you don’t have caster)
170 milliliters (2/3 cup) water, chilled
665g (scant 5 1/4 cup) all-purpose flour, chilled
5 g (1 teaspoon) salt
Chocolate ganache tartlets (makes 20)
1 quantity sweet shortcrust pastry
850g (1 pound, 14 ounces) good-quality milk chocolate, finely chopped
500 milliliters (2 cups) whipping cream
*Note: conversions from weight are always approximate. I have based them on this website.
Instructions
Sweet shortcrust pastry
This recipe makes enough pastry for twenty 8cm (3 1/4 inch) tartlets with a little left over. The number of tarts is going to vary baker to baker depending on how thin the pastry is rolled. The pastry can be frozen for up to 2 months. This recipe requires either a full morning or afternoon of cooking or starting a day in advance.
—-
Remove butter from fridge 20 minutes before using. Butter should be cold but somewhat pliable.
Place the vinegar and sugar in a small bowl, then add the water, stirring well. Set aside for 10 minutes and then stir again to ensure sugar is dissolved.
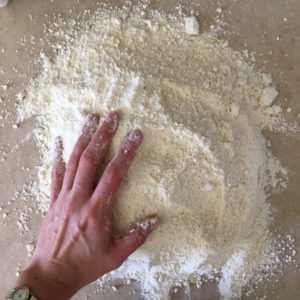
Place the flour, salt and butter in food processor and pulse until resembles breadcrumbs. (Or, if mixing by hand, mix together the flour and alts in a large bowl and toss through the butter. Use your fingertips to rub the butter into the flour to partly combine.) Either way, you should now have a floury mix through which you can see squashed pieces of butter.
Tip mixture out onto a clean work surface and gather together. Slowly sprinkle over the sugar mixture and smear the dough away from you across the work surface. Gather the dough together and repeat two to four times more. You should still be able to see streaks of butter marbled through the pastry; this gives a slightly flaky texture to the final product.
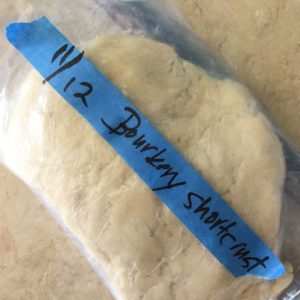
Divide the dough into two evenly-sized portions and shape into two round, flat disks about 2cm (3/4 inch) thick. Wrap each disk in plastic wrap and refrigerate for at least 2 hours or overnight.
Remove pastry from the refrigerator 20 minutes before you wish to roll it. Sprinkle a little flour on the work surface and rub a little flour over a rolling pin. (Or, do as I do, and place the dough between two pieces of wax paper or baking paper, which makes this whole process much easier.) Working from the center of the pastry, gently roll the dough away from you, then turn the dough about 30 degrees and roll out again. Repeat this process until you have a flat round disc, about 3mm (1/8 inch) thick. Sprinkle extra flour over the bench and rolling pin as needed, but try to use it as sparingly as possible (as too much will eventually change the texture of the dough). Transfer the pastry to a try and place in the refrigerator, covered in plastic wrap, for at least 2 hours to allow the gluten to relax.
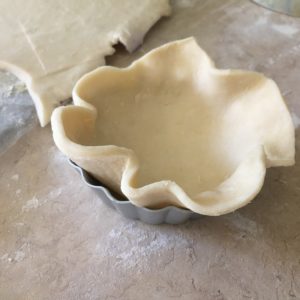
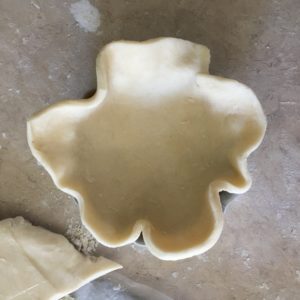
Brush 20 (or 10, if you’re saving half the dough for later) loose-based, 8cm (3 1/4-inch) individual tart tins with a little butter. Cut the pastry using a round pastry cutter or glass with an 11cm (4 1/4 inch) diameter. Place the pastry on top of the mould ensuring it is int he center and use your fingers to gently push the pastry into the mould, moving around the rim until all of the pastry has been inserted. You should now have about 1cm (1/2 inch) of dough hanging over the sides. Use your index finger and thumb to work your way around the edge forcing the pastry into the mould so that little or no pastry is left protruding. Where the upright edge of the pastry meets the base there should be a sharp angle where it has been firmly forced into the corner–this method of lining the tin is to counteract the pastry shrinking once baked.
Set the pastry cases aside to rest for at least 20 minutes in the freezer so that the gluten relaxes and holds its shape when you line it with foil.
Line each tart with a double layer of aluminum foil, making sure the foil is pushed well into the corners. Pour in some baking beads or uncooked beans to fill the case and bake 20-25 minutes. Baking time will vary considerably from oven to oven. When cooked properly, the pastry should have a golden color all over, particularly in the center, which tends to be the last part to color and crisp. The tart shells are now ready to be filled.
Chocolate ganache tartlets
Put the chocolate in a stainless steel bowl.
Put the cream in a saucepan and bring to a boil over high heat. This needs to happen quickly so the cream doesn’t evaporate and reduce in volume. Pour the cream over the chocolate and stir with a rubber spatula or wooden spoon until well combined. Be careful not to make air bubbles, which will give a pocked look to the top of the tarts.
Put the chocolate mixture into a jug or a big measuring cup (anything with a spout, to allow for precision) and then pour into the baked, cooled tart shells until filled to the brim.
Allow the tarts to set at room temperature overnight in an airtight container. These tarts are best not refrigerated.
Do ahead: These are the ideal make-ahead dessert, since they really need to set overnight. The dough requires two long stretches of at least 2 hours each in the refrigerator, then placed in tartlet tins and refrigerated again before baking. Two days in advance, you could get all of the dough finished up through putting the dough in the tartlet tins and placing them in the freezer. One day in advance, you could then bake the shells and fill them with the ganache. That said: I have made these entirely in one long day of baking.
Leave a Reply